PostgreSQL window安装教程
window安装PostgreSQL
建表语句:
DROP TABLE IF EXISTS student;
CREATE TABLE student (
  id serial NOT NULL,
  name varchar(100) NOT NULL,
  sex varchar(5) NOT NULL,
  PRIMARY KEY (id)
);

INSERT INTO student (id, name, sex) VALUES (1, '小明', '男');
INSERT INTO student (id, name, sex) VALUES (2, '小红', '女');

CREATE TABLE IF NOT EXISTS score
(
    id integer NOT NULL,
    student_id integer NOT NULL,
    grade integer NOT NULL,
    PRIMARY KEY (id)
);

insert into score(id,student_id,grade)values(1,1,80);
insert into score(id,student_id,grade)values(2,2,90);
PostgreSQL自增
MySQL 是用 AUTO_INCREMENT 这个属性来标识字段的自增。

PostgreSQL 使用序列来标识字段的自增长:

CREATE TABLE runoob
(
    id serial NOT NULL,
    alttext text,
    imgurl text
)
https://www.runoob.com/postgresql/postgresql-autoincrement.html
PostgreSQL表的创建
PostgreSQL表的创建
PostgreSQL linux安装教程1——centos6
linux安装PG教程
(1)安装依赖包
yum install -y perl-ExtUtils-Embed readline-devel zlib-devel pam-devel libxml2-devel libxslt-devel openldap-devel python-devel gcc-c++ openssl-devel cmake
(2)下载PG安装包
http://www.postgresql.org/ftp/source/
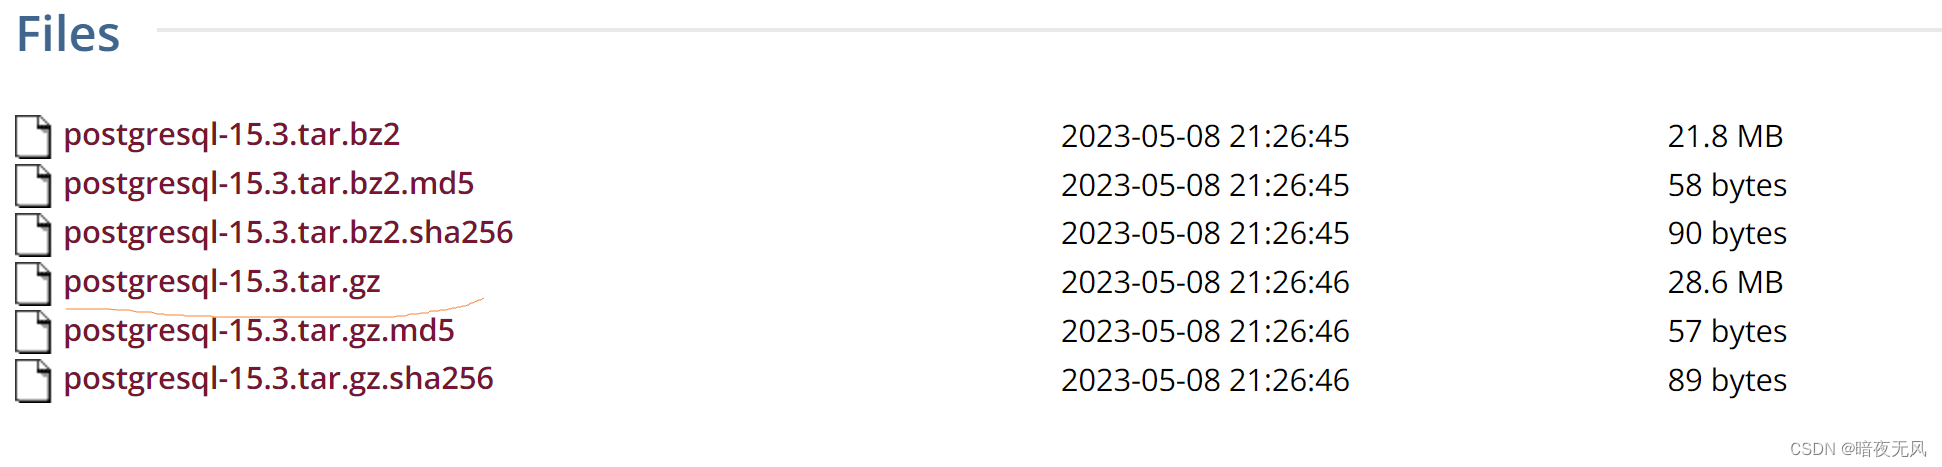
(3)解压安装
在根目录下新建pgsql文件夹,并将pgsql的压缩包移入
tar -zxvf postgresql-15.3.tar.gz
进入解压后的文件夹,编译postgresql源码
cd postgresql-15.3/

./configure --prefix=/pgsql/postgresql
make:
make

make install
进入/pgsql/postgresql目录可以看到安装后的postgresql的文件。

(5)创建用户组postgres并创建用户postgres
groupadd postgres

useradd -g postgres postgres

id postgres
结果:
uid=501(postgres) gid=501(postgres) 组=501(postgres)
(6)创建postgresql数据库的数据主目录并修改文件所有者
cd /pgsql/postgresql

mkdir data

chown postgres:postgres data

ls -al

(7)配置环境变量
进入home/postgres目录可以看到.bash_profile文件。
cd /home/postgres

ls -al

修改:
vim .bash_profile
使其生效
source .bash_profile
(8)切换用户到postgres并使用initdb初使用化数据库
su - postgres

initdb
可以看到 /pgsql/postgresql/data已经有文件:
cd /pgsql/postgresql/data

ls

(9)配置服务
修改/pgsql/postgresql/data目录下的两个文件。
-
postgresql.conf 配置PostgreSQL数据库服务器的相应的参数。
-
pg_hba.conf 配置对数据库的访问权限。
vim postgresql.conf
listen_addresses = '*'
把这个地址改为*,表示在本地的所有地址上监听
vim pg_hba.conf
在# IPv4 local connections:下添加:
host all all 0.0.0.0/0 trust
(10)设置PostgreSQL开机自启动
PostgreSQL的开机自启动脚本位于PostgreSQL源码目录的contrib/start-scripts路径下。
cd /root/pgsql/postgresql-15.3/contrib/start-scripts

添加执行权限:
chmod a+x linux
复制linux文件到/etc/init.d目录下,更名为postgresql:
cp linux /etc/init.d/postgresql
修改/etc/init.d/postgresql文件的两个变量:
# Installation prefix
prefix=/pgsql/postgresql

# Data directory
PGDATA="/pgsql/postgresql/data"
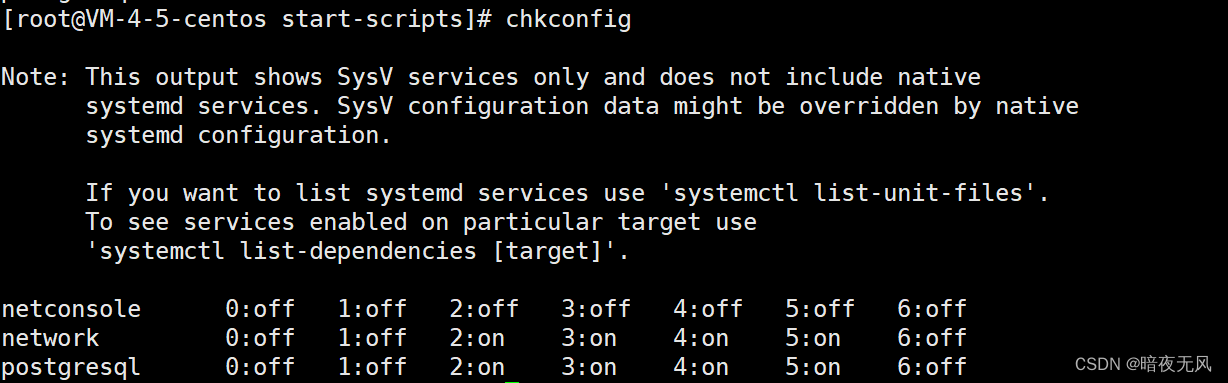
设置postgresql服务开机自启动
chkconfig --add postgresql
查看:chkconfig
编辑/etc/sysconfig/iptables文件开放5432端口:
cd /etc/sysconfig

vim iptables
添加下列内容:
-A INPUT -p tcp -m tcp --dport 5432 -j ACCEPT
重启服务,或者其它命令:
systemctl restart iptables.service
查看端口是否开放:
/sbin/iptables -L -n
执行service postgresql start,启动PostgreSQL服务:
service postgresql start

查看PostgreSQL服务:
ps -ef | grep postgres
如果没有iptables:
systemctl stop firewalld.service && systemctl disable firewalld.service

yum install iptables-services iptables-devel

systemctl enable iptables.service && systemctl start iptables.service
查看状态 systemctl status iptables.service

查看iptables配置文件 vim /etc/sysconfig/iptables
psql失败:
psql: error: connection to server on socket "/var/run/postgresql/.s.PGSQL.5432" failed: Connection refused
	Is the server running locally and accepting connections on that socket?
tail -f /pgsql/postgresql/data/pg_log/postgresql-*.log
netstat -nlp | grep 5432后没有任何信息,说明postgresql服务没有顺利启动。
PostgreSQL linux安装教程2——centos7
centos7安装PG
centos7安装PG2
centos7安装PG3
(1)进入官方下载https://www.postgresql.org/download/
选择对应的系统和对应的版本,注意,版本不要太高:

PG11安装命令:
# Install the repository RPM:
sudo yum install -y https://download.postgresql.org/pub/repos/yum/reporpms/EL-7-x86_64/pgdg-redhat-repo-latest.noarch.rpm

# Install PostgreSQL:
sudo yum install -y postgresql11-server

# Optionally initialize the database and enable automatic start:
sudo /usr/pgsql-11/bin/postgresql-11-setup initdb
sudo systemctl enable postgresql-11
sudo systemctl start postgresql-11
创建数据库测试:
切换到postgres用户
su - postgres
psql
创建用户
create user test with password '123.com';
创建数据库
create database test_db owner test;
退出
\q
(2)配置远程连接
修改文件postgresql.conf :
vim /var/lib/pgsql/11/data/postgresql.conf
添加:
listen_addresses = ‘*’
修改pg_hba.conf文件:
vim /var/lib/pgsql/11/data/pg_hba.conf
添加:
host all all 0.0.0.0/0 trust
(3)重启并关闭防火墙
重启服务:
systemctl restart postgresql-11.service
关闭防火墙:
systemctl stop firewalld
注意,
- 如果是腾讯云/阿里云,需要配置端口开放,很多时候卡在这。
- 防火墙没关闭完全
- 连接软件全都关闭试试
(4)验证
可以通过navicat来尝试能否连接hsang
PG常用指令
PG数据库教程
查看数据库
\l
使用数据库
\c imdbload
查看表
\dt
查看索引
\di
执行sql脚本
\i /var/lib/pgsql/benchmark/schematext.sql;
生成执行计划
EXPLAIN (FORMAT JSON, analyze)
SELECT MIN(mc.note) AS production_note,
       MIN(t.title) AS movie_title,
       MIN(t.production_year) AS movie_year
FROM company_type AS ct,
     info_type AS it,
     movie_companies AS mc,
     movie_info_idx AS mi_idx,
     title AS t
WHERE ct.kind = 'production companies'
  AND it.info = 'top 250 rank'
  AND mc.note NOT LIKE '%(as Metro-Goldwyn-Mayer Pictures)%'
  AND (mc.note LIKE '%(co-production)%'
       OR mc.note LIKE '%(presents)%')
  AND ct.id = mc.company_type_id
  AND t.id = mc.movie_id
  AND t.id = mi_idx.movie_id
  AND mc.movie_id = mi_idx.movie_id
  AND it.id = mi_idx.info_type_id;
创建物化视图
CREATE MATERIALIZED VIEW mv2 AS
select info_type.id AS id, info_type.info AS info, movie_info_idx.movie_id AS movie_id
 from movie_info_idx,info_type
 where (movie_info_idx.info_type_id = info_type.id) And (info_type.info = 'top 250 rank');
EXPLAIN (FORMAT JSON, analyze)
select info_type.id AS id, info_type.info AS info, movie_info_idx.movie_id AS movie_id
 from movie_info_idx,info_type
 where (movie_info_idx.info_type_id = info_type.id) And (info_type.info = 'top 250 rank');
EXPLAIN (FORMAT JSON, analyze)
SELECT MIN(t.title) AS movie_title
FROM company_name AS cn,
     movie_companies AS mc,
     title AS t,
     mv12
WHERE cn.country_code ='[us]'
  AND cn.id = mc.company_id
  AND mc.movie_id = t.id
  AND t.id = mv12.movie_id
  AND mc.movie_id = mv12.movie_id;
postgreSQL取某个表的前100行作为一个新表
CREATE TABLE new_table AS
SELECT * FROM original_table
LIMIT 100;
暂停PG运行
sudo systemctl stop postgresql-11
设置PG并行执行相关
set max_parallel_workers_per_gather = 0;
表示禁用每个 Gather 操作的并行执行。
如果您需要禁用全局并行查询,您还需要将 max_parallel_workers 参数设置为 0
关闭Memoize算子
set enable_memoize TO off;
修改PG参数文件
14是PG的版本名字
/var/lib/pgsql/14/data
可修改参数:
(1)work_mem
在 PostgreSQL 中,work_mem 参数控制每个工作进程使用的内存量。该参数设置得越高,可以执行更复杂的查询,但是也将占用更多的系统资源和内存。
work_mem = 2GB
(2)shared_buffers
请注意,shared_buffers 参数控制着 PostgreSQL 使用的共享内存缓冲区的大小。设置得太小可能导致频繁的磁盘读写操作,而设置得太大可能会占用过多的系统内存。建议根据您的硬件配置和数据库负载进行适当的调整。
shared_buffers = 1GB
(3)effective_cache_size
请注意,effective_cache_size 参数用于告诉 PostgreSQL 系统可用的内存缓存大小。设置得太小可能导致频繁的磁盘读写操作,而设置得太大可能会占用过多的系统内存。建议根据您的硬件配置和数据库负载进行适当的调整。
effective_cache_size = 32GB
(4)gego_threshold
gego_threshold = 18
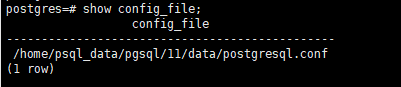
查看配置文件路径
show config_file;
修改PG的data存储路径
https://www.cnblogs.com/miracle-luna/p/17019256.html
em` 参数控制每个工作进程使用的内存量。该参数设置得越高,可以执行更复杂的查询,但是也将占用更多的系统资源和内存。
work_mem = 2GB
(2)shared_buffers
请注意,shared_buffers 参数控制着 PostgreSQL 使用的共享内存缓冲区的大小。设置得太小可能导致频繁的磁盘读写操作,而设置得太大可能会占用过多的系统内存。建议根据您的硬件配置和数据库负载进行适当的调整。
shared_buffers = 1GB
(3)effective_cache_size
请注意,effective_cache_size 参数用于告诉 PostgreSQL 系统可用的内存缓存大小。设置得太小可能导致频繁的磁盘读写操作,而设置得太大可能会占用过多的系统内存。建议根据您的硬件配置和数据库负载进行适当的调整。
effective_cache_size = 32GB
(4)gego_threshold
gego_threshold = 18
查看配置文件路径
show config_file;
[外链图片转存中…(img-ojLvcnHW-1705414404781)]
修改PG的data存储路径
https://www.cnblogs.com/miracle-luna/p/17019256.html